
One of the issues with having a large collection of music is that it has been mastered at different levels. That was less of an issue in days past when you would play an entire album in order on CD or LP (ask your grandparents what that was). With the ease of ripping and playing in formats like MP3 and AAC this has meant a person’s collection of music can be played in any order imaginable. This can mean a song mastered in the past can come immediately after one done so with today’s sledgehammer subtlety (see The Loudness War). This is annoying at the best of times but extremely annoying for Group Fitness instructors. This post will hopefully help those people.
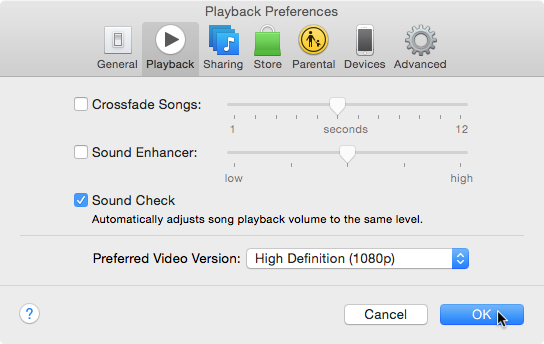
There’s a lot of things to be said about iTunes. Some of them include words that aren’t four letters long. One of the more useful settings that can be located in the Preference panel is the playback option where Sound Check is turned on. This tries to get all songs to play back at the same apparent volume. Which is fine if you’re listening at home or doing a class from a laptop but not quite workable if you’re using a smaller player.
For that I recommend a product called iVolume. I have used it for a number of years and found it to work quite well. It nudges the loudness settings on songs to set them to a similar level – and retains that data when the songs are moved on to a device such as an iPhone or iPod touch. This ensures that the apparent loudness of songs from very different times sound the same. This seems to be an issue in the area of Les Mills songs where today’s digital downloads appear much quieter than the tracks on CD from a few years back. It’s something that can be disconcerting when they are placed adjacent in a mix.
I have only ever used the Mac version so that’s what will be shown in the examples. A Windows version is available and I can only assume it works in a similar manner.
Step 1 : Open iVolume
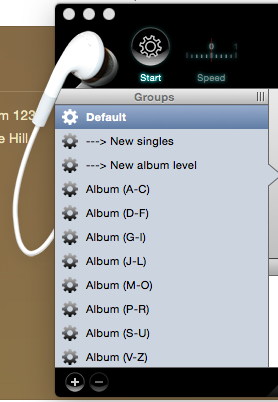
You’ll see an area titled ‘Groups’ on the left-hand side. If you’ve just opened it up then only the ‘Default’ group will be listed. There’s a lot more shown in the picture because I’ve added them over the years to meet the needs of the way I look at the world. Yours will probably differ significantly.
Step 2 : Add Groups

Click the little + button at the bottom left of the Groups column to add a group. I suggest creating two – LM single and LM multiple. The idea of separate ones will become apparent later one. Hint: it’s to do with those pesky tracks that blend into each other such as the first three of BODYSTEP, the first two of BODYATTACK, and pretty much everything in the mash-it! versions of BODYJAM.
Step 3 : The Single Group Settings
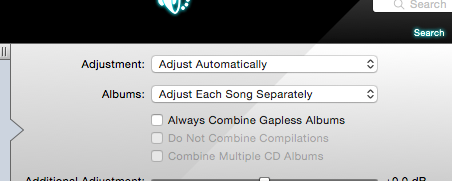
Click on the LM single group to see the configuration values appearing just under the logo in the centre of the window title bar. Set them so they appear as in the picture above. This will ensure that each song in the LM single group will be adjusted so that its peak volume within the track will have the same volume as every other song in the group.
Step 4 : The Multiple Group Settings
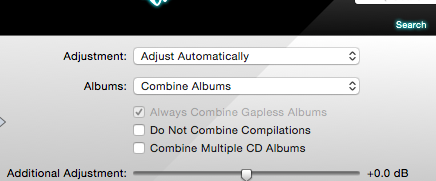
Click on the LM multiple group to see the configuration values appearing just under the logo in the centre of the window title bar. Set them so they appear as in the picture above. This will treat the songs from each album as a specific set. It will ensure that every song in each set will be adjusted so that the peak volume across all tracks in the set will have the same volume as other sets in the LM multiple group.
As an example if we had two albums – say a murmuring acapella one and a not so quiet thrash metal one. If we placed both albums in this group then both albums would keep their same relative loudness between tracks. If there was a quiet one followed by a loud one then that would still remain. But the loudest overall sound on the acapella one would be changed to being the same apparent loudness as that of the loudest overall sound on the thrash metal one. It may not please the audiophiles but it means far less need to fumble to find the volume control as the track changes.
Why would you want to do an entire album rather than just each song individually? Mainly for those situations where songs blend into each other and they have very different sound levels. An example is Tool’s Parabol/Parabola where a whisper-quiet first track becomes a thundering second one. Treating them as individual rather than multiplely-grouped songs produces a first part that drops away into a relatively quiet second part because the first part has been raised artificially high in comparison to what is meant to come after it.
Step 5 : iVolume Settings
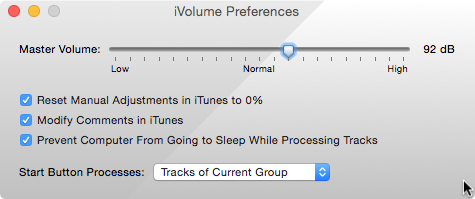
This is the important bit. Open the iVolume preferences and select what the master volume should be. From experience 92dB is a good value. It also means the spoken word countdowns in certain software (*cough*) is at a similar volume. Set the rest of the options as per the above picture.
Step 6 : The Default Group
When you add new items to iTunes and then open iVolume it will automatically show them in the Default group. This may be a bit of shock when you first open the application if you have a large music library. Simply drag the songs into the relevant groups – don’t forget you can create as many as you want – select the group and then hit the Start button to begin processing.
Step 7 : Run the Volume Adjustment
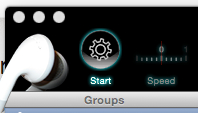
Select a group and hit the Start button. This may take some time. It will depend on the speed of your machine and how many songs in the group. And when I say it may take some time that can be hours. I suggest you put a couple of albums into a group and see how long that takes before dumping all 50,000 of your songs in there. Trust me on this – I’m a man who used it to process 30,000 songs at once using an iMac G5. It got there. Eventually.
Step 8 : Les Mills Groupings

As mentioned in step 2 it makes sense to treat songs that blend into each other as a group. This ensures that the transition between those tracks stays at the originally mastered volume and doesn’t produce a sudden ‘jump’. The three opening tracks of BODYSTEP are meant to be seamless so keeping them as a group makes for a smoother experience as there is no apparent sound change in volume as one song merges into another. The individual blocks in BODYJAM should also be treated in the same manner since the songs that make them up are meant to rise and fall in volume within that specific group.
Step 9 : The Rest
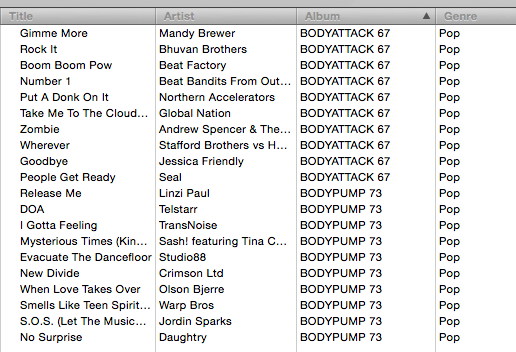
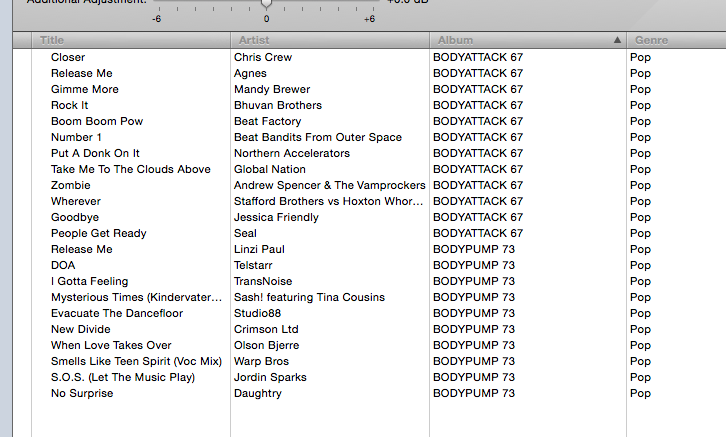
You can drop tracks that belong together in a group and treat the rest as individual ones. See the above two pictures for how the opening two tracks of BODYATTACK are treated as a group while the rest can be done separately. BODYPUMPers have it easiest – everything is an individual track.
Step 10: Buy iVolume
iVolume can be purchased from the developer’s site here. Trial versions are available.
It seems to be a bit more expensive than when I first bought it about seven years ago but good and useful software is well worth the money for the craft and effort that went into it
If you buy the App Store version using this affiliate link then I’ll be grateful for the small amount it generates.